
2.3 Fuellox Facia
2.3 Fuellox Facia
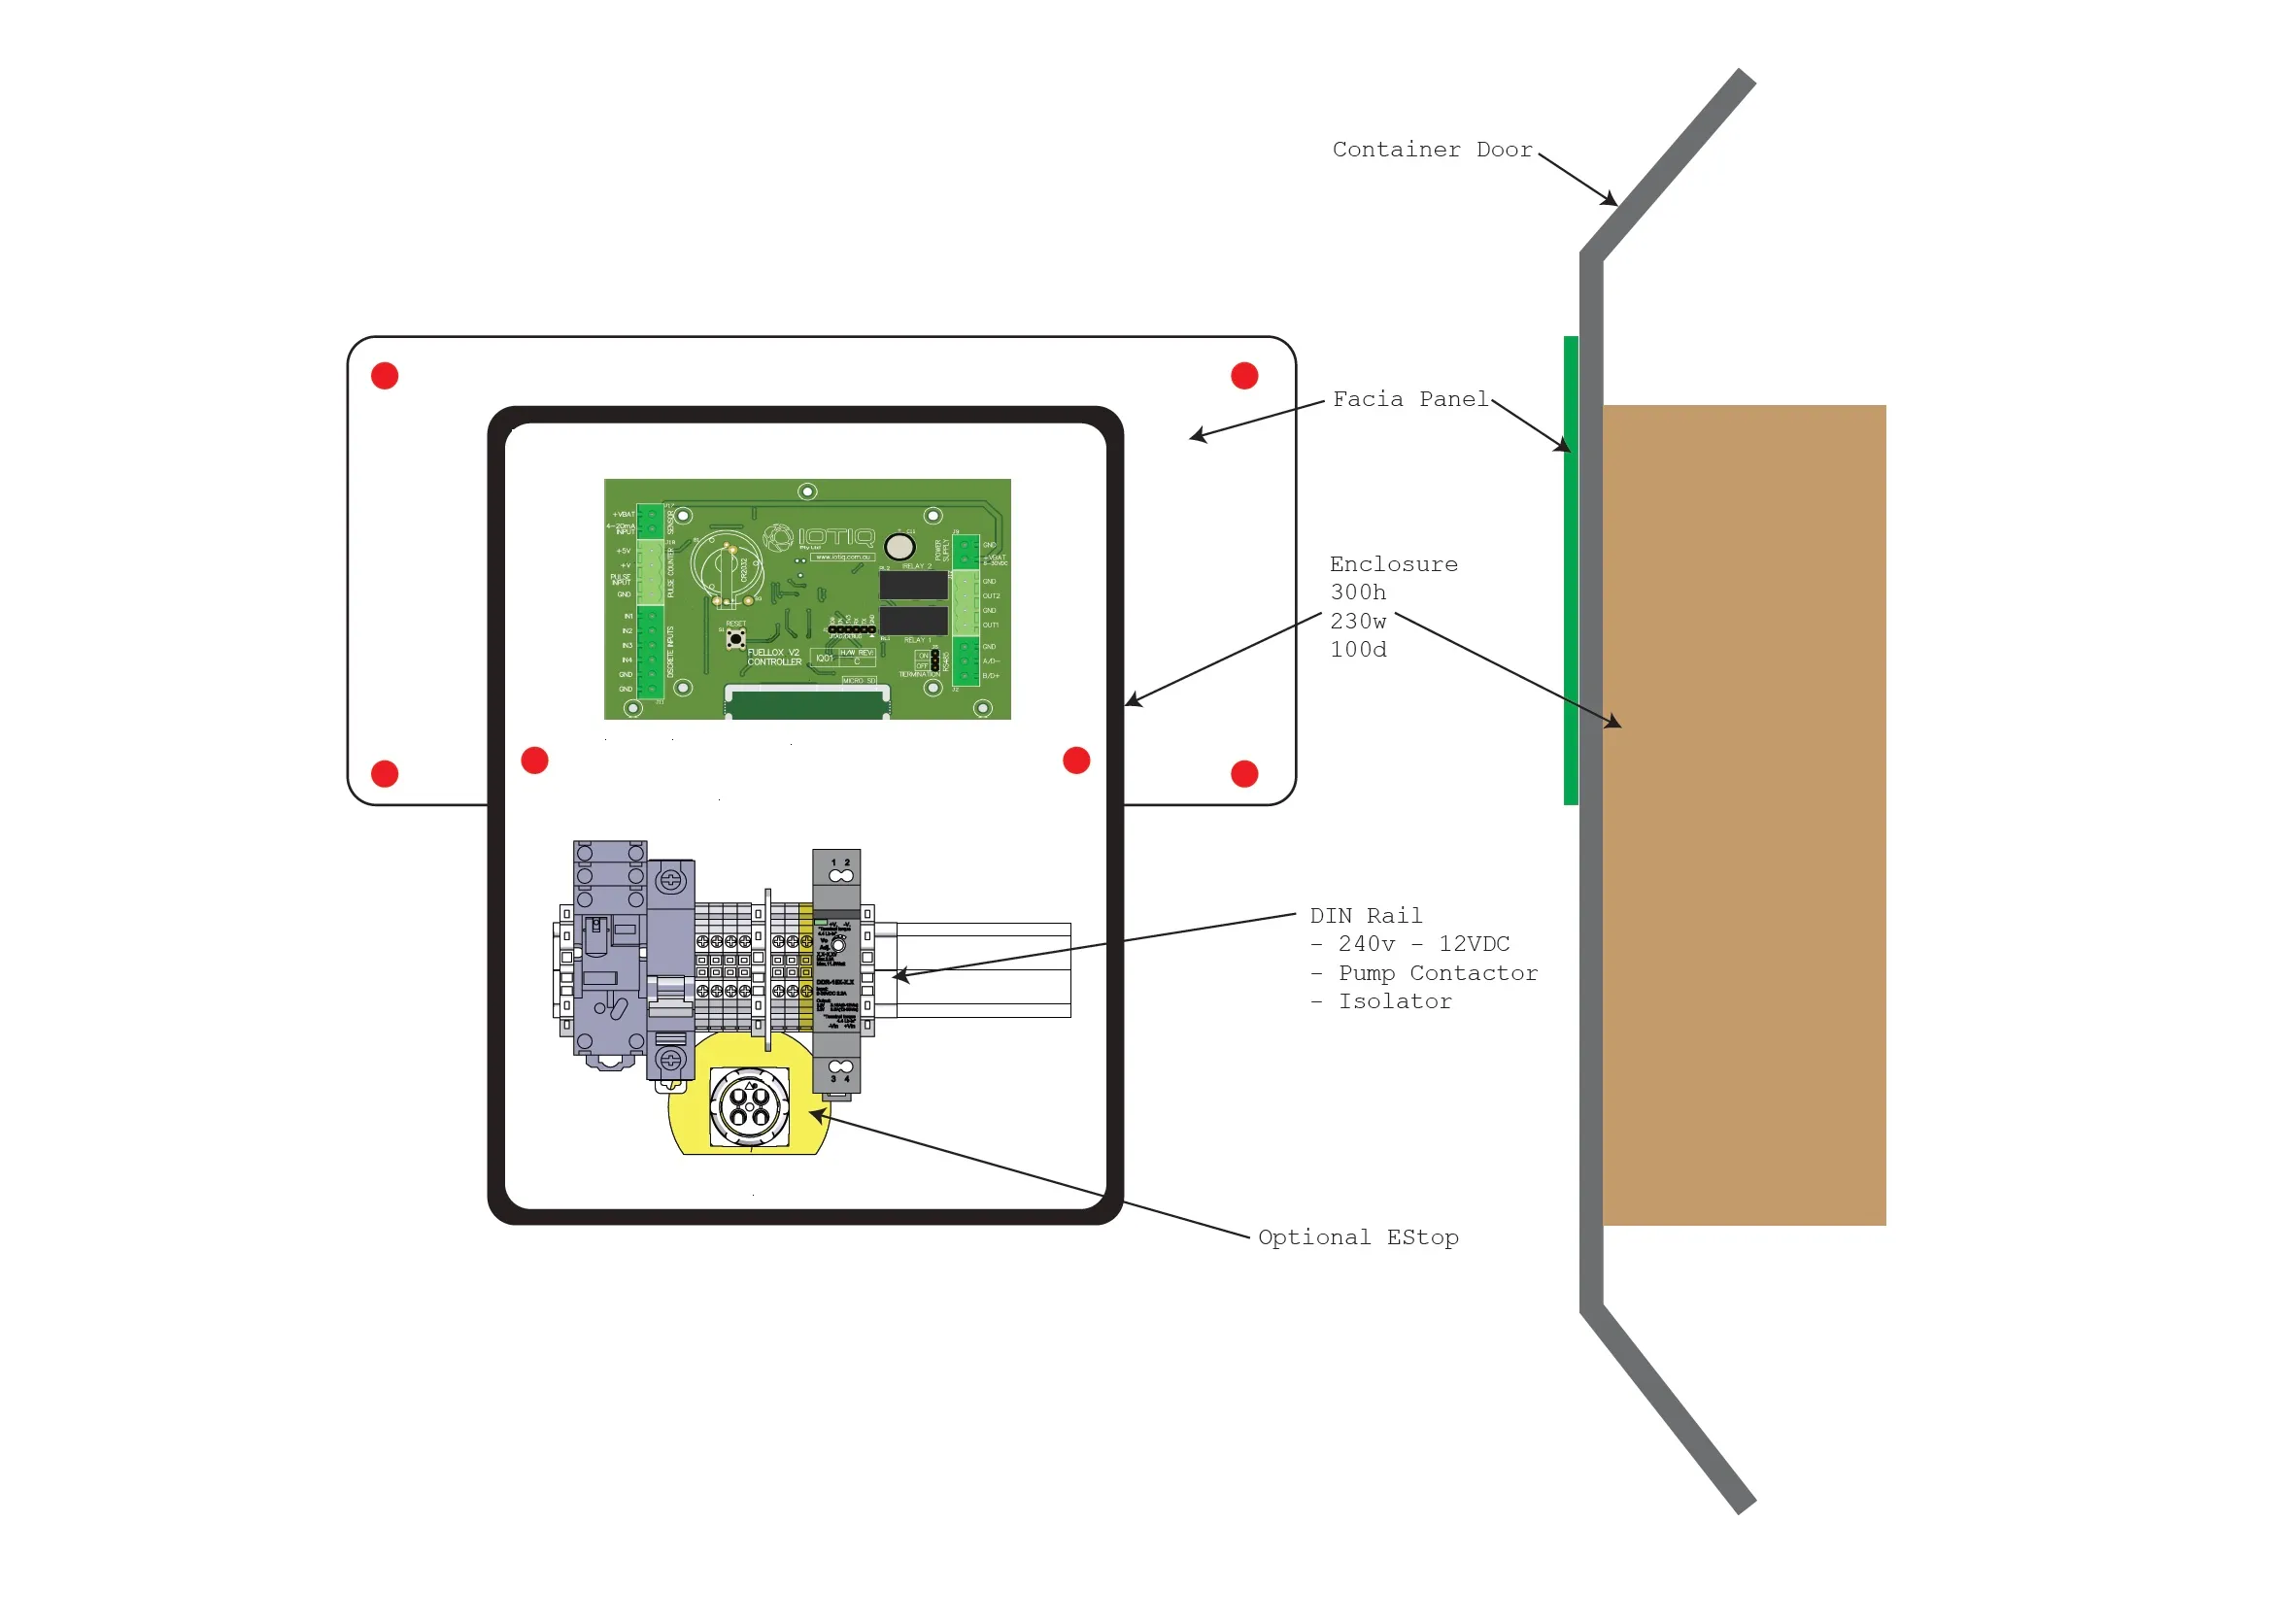
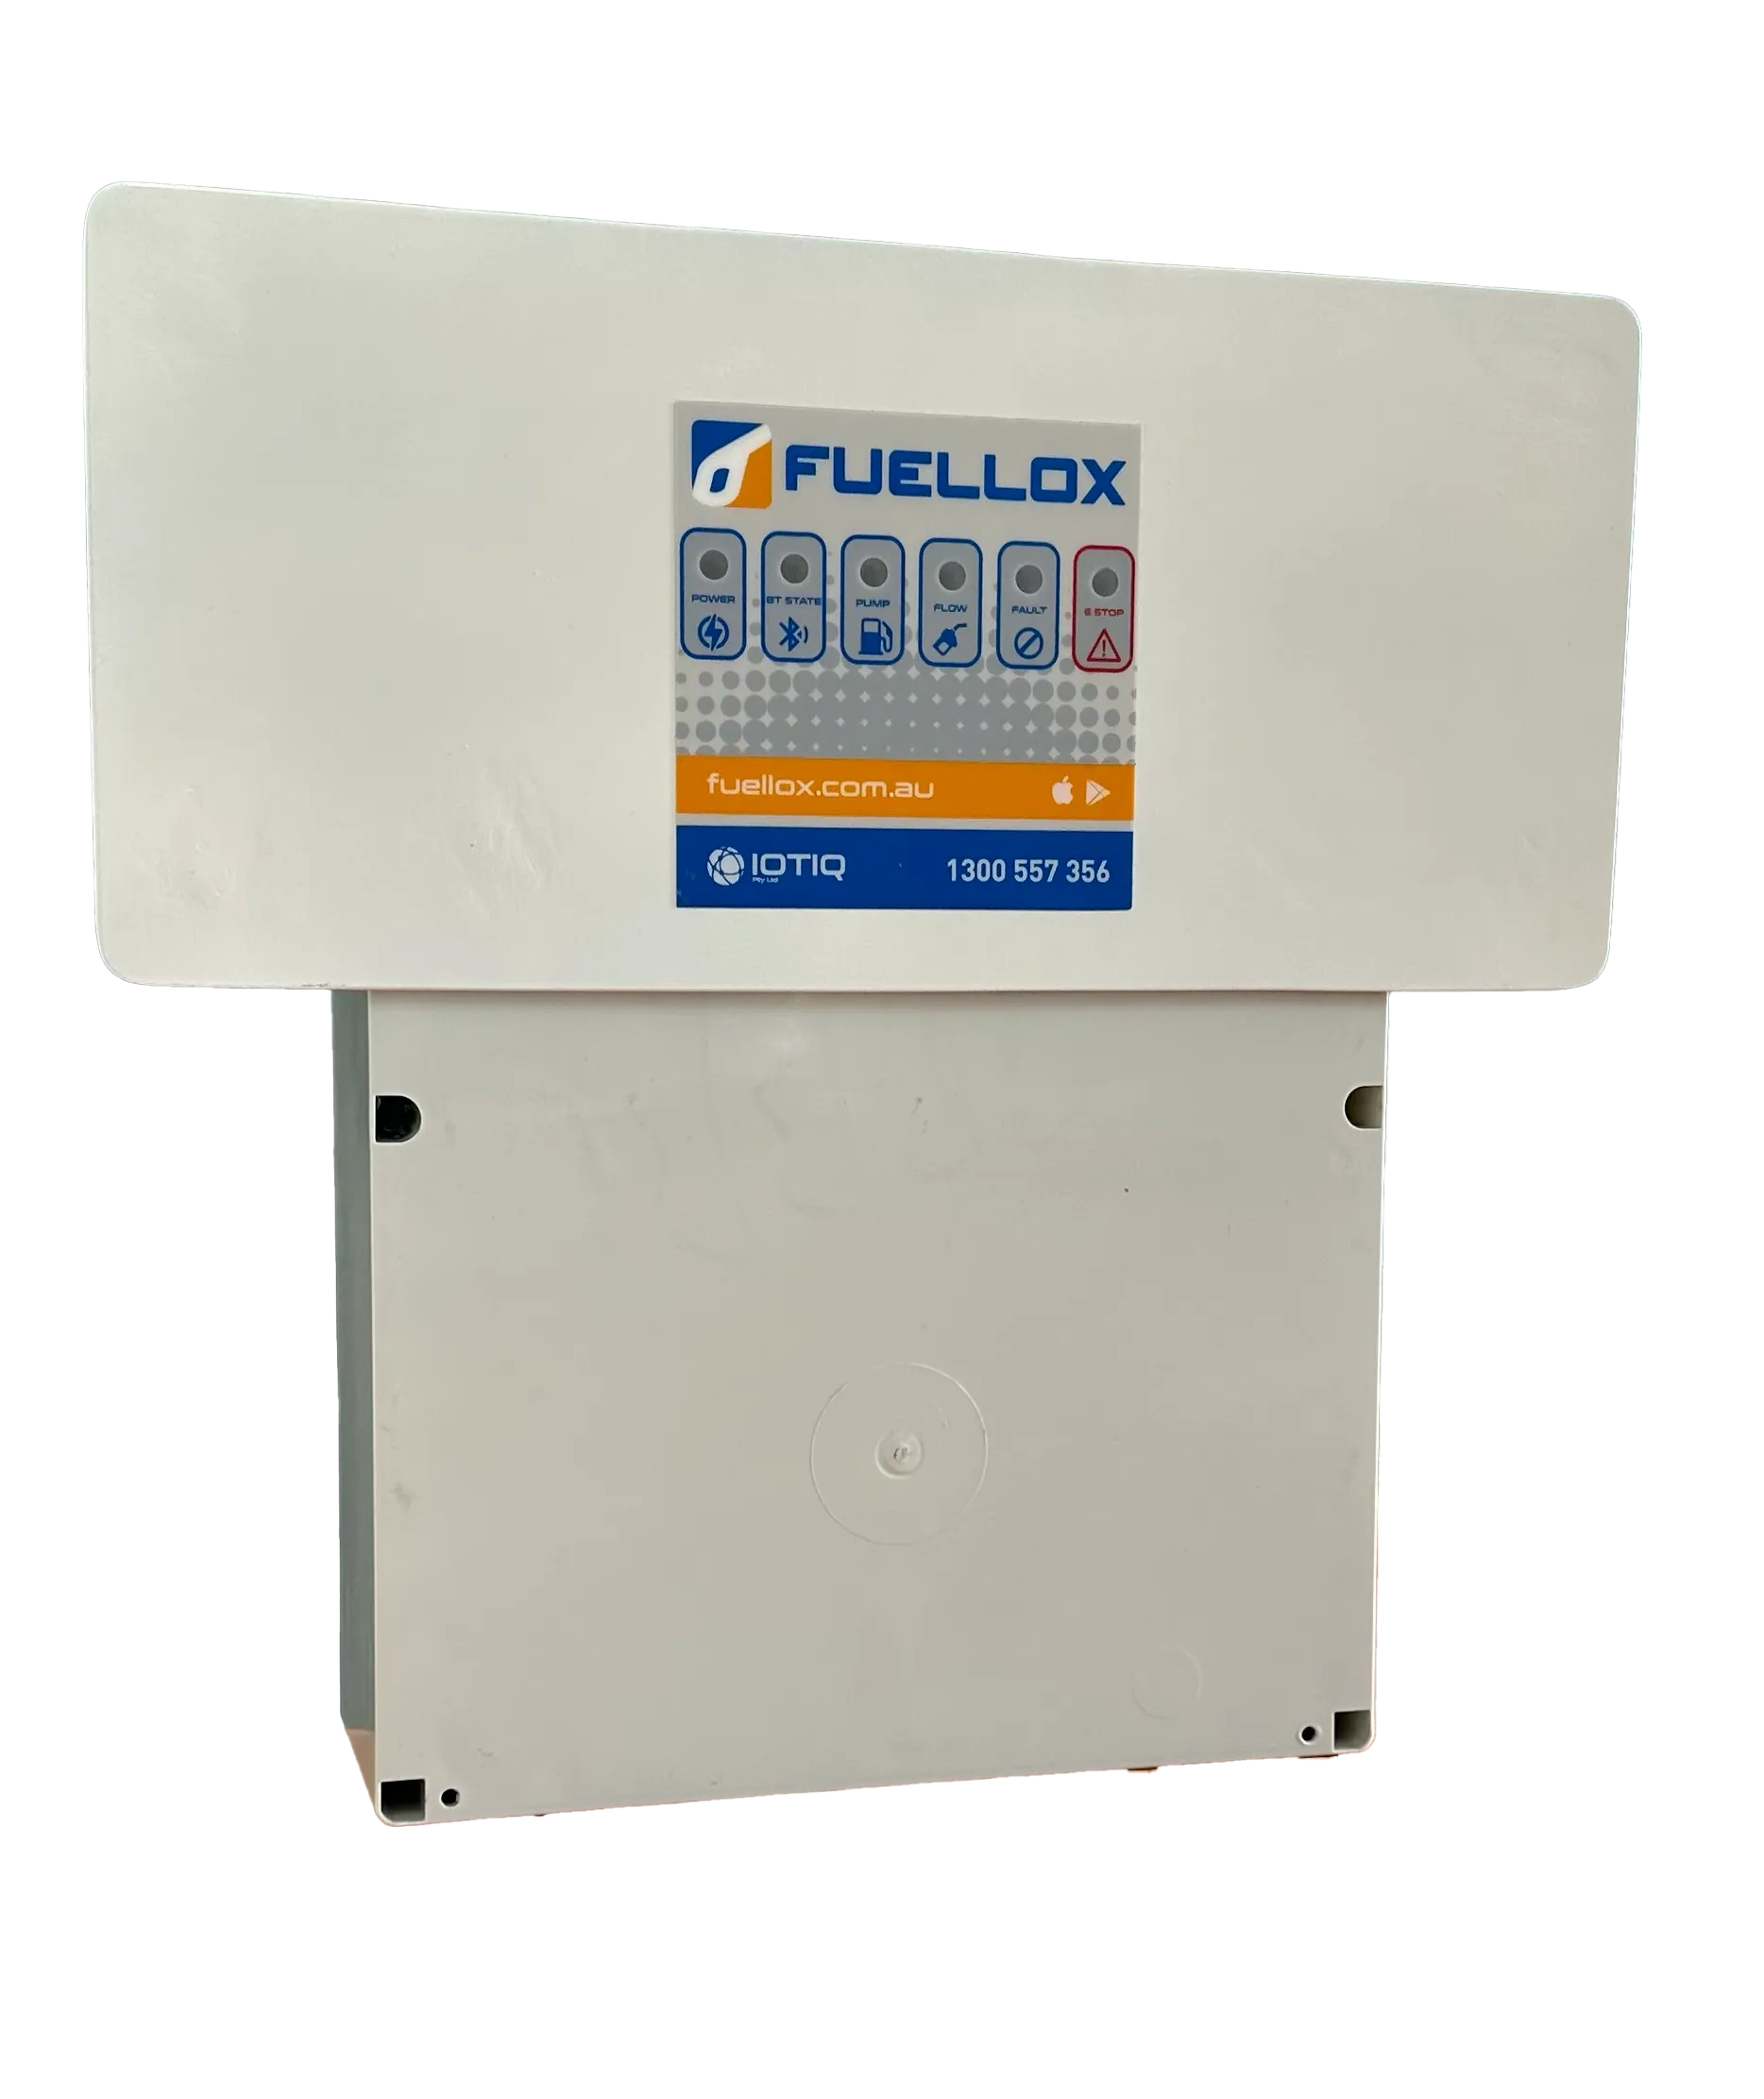
Fuellox Facia is ideal for installations where the electronics are to be inside an enclosure of some type, and the user interface is external.
Installation Locations:
- On Electrical Cabinets
- Container Doors or Sides
Fuellox Facia Overview
Fuellox Facia Front
Fuellox Facia Inside
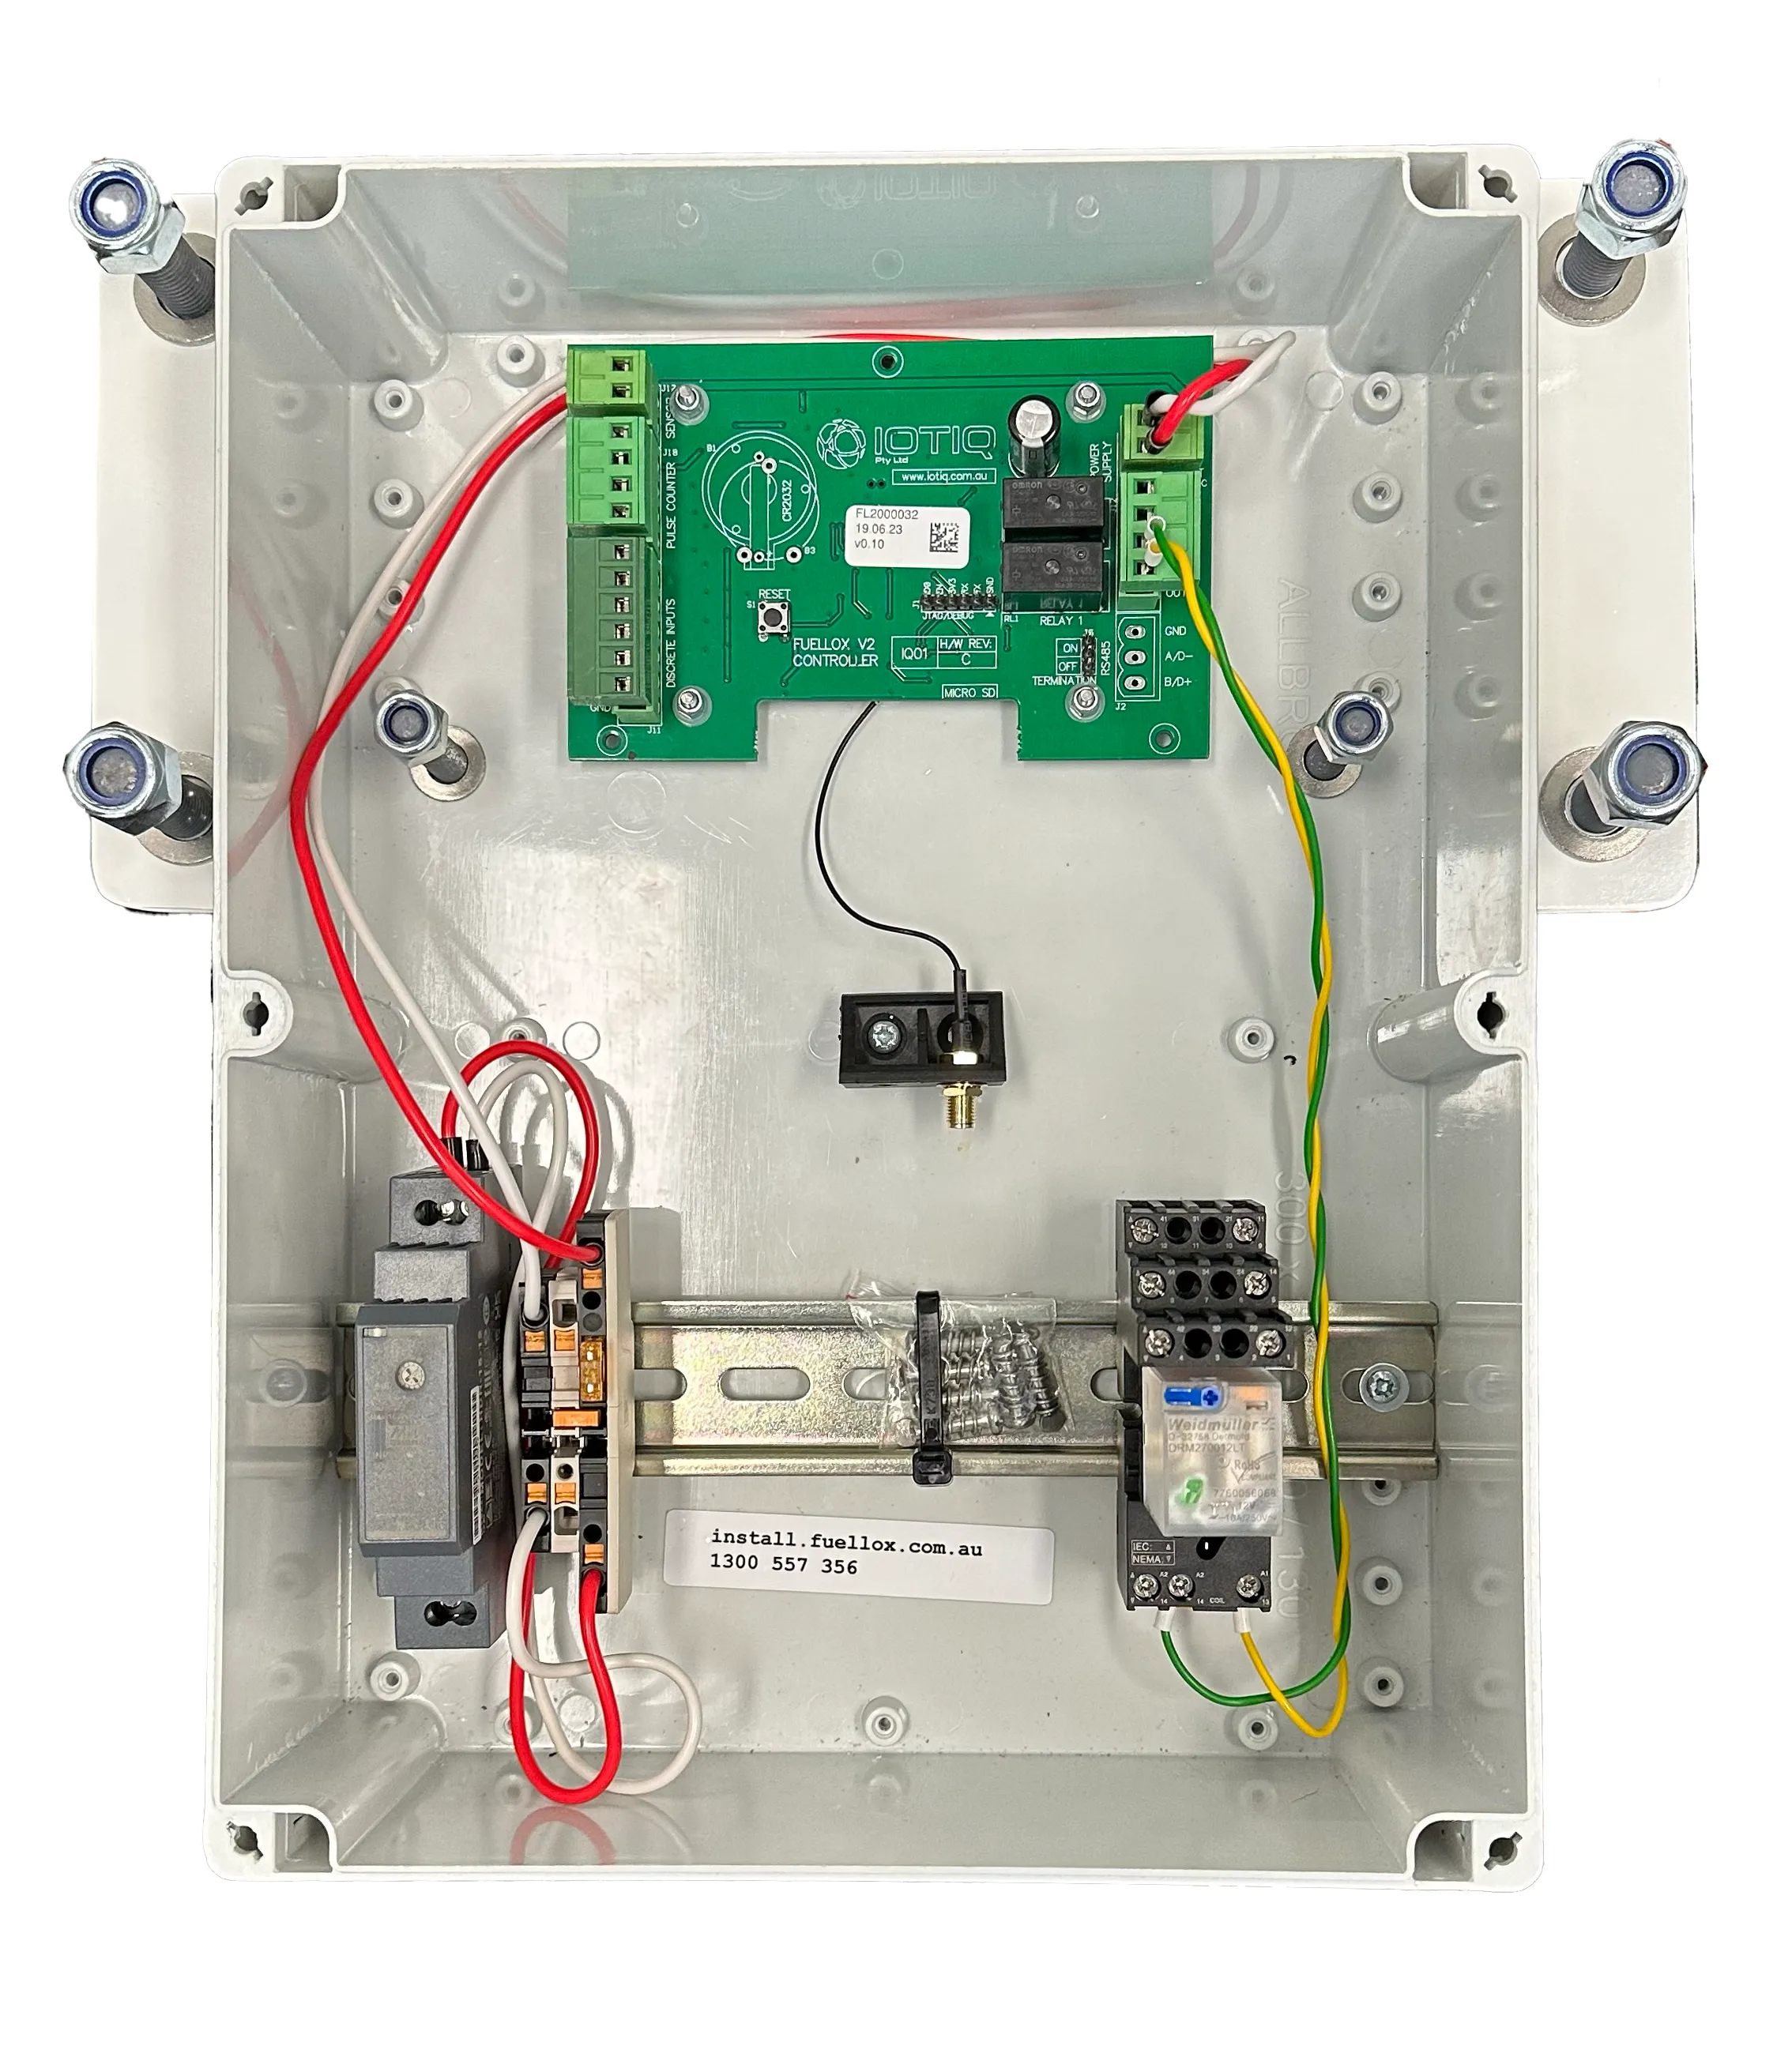
Main Elements
| Part | Description |
|---|---|
| PCB | Fuellox PCB |
| Power Supply | Meanwell 240V to 12V DC Power Supply + Connectors and fuse |
| Relay | 2 channel relay with 12V DC Coil |
| BLE | Bluetooth Aerial connector |
Note the DIN rail may come with addional connectors. In some cases the relay may be used in conjunction with or replaced by a high current contactor.
2.3.1 Preparation
Place the template onto the surface where the Fuellox Facia will be mounted.
Check to make sure you have the correct template, and verify the hole sizes match the studs on your parts.
Template A3

PDF Template for Download - Print on A3
2.2.3 Mounting
Fix the Facia panel to the tank using a silicon type sealant.
Bolt down the 4 main studs using a suitable washer and a nylex nut.
Install the Fuellox Enclosure to the mount studs and scure that with washers and nylex nuts.
2.3.3 Wiring
Fuellox Facia comes in a 240V AC variant, or a 12V DC Variant.
!!! Danger 240V AC systems must be installed by a licensed electrical contractor.
2.3.3.1 12V DC systems
Follow the 12V DC wiring guide here.
2.3.3.2 240V AC systems
Follow the mains and pump 240 V AC wiring guide here and the balance of the connections according to the main wiring detail