
Calibration
Here are the instructions on how to calibrate your flow meters using the Fuellox system.
This calibration procedure is recommended for small tanks fitted with turbine meters. For larger tanks, we recommend using a Flomec meter with factory calibration instead.
-
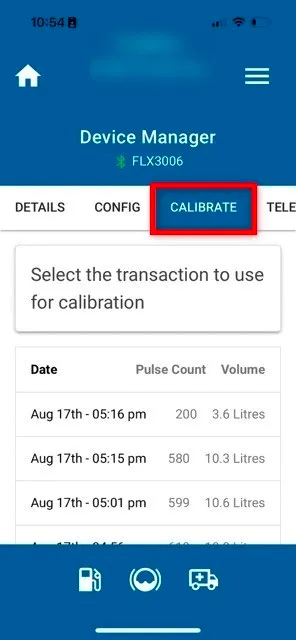
Click the Calibrate Tab from the Device Manager section.
-
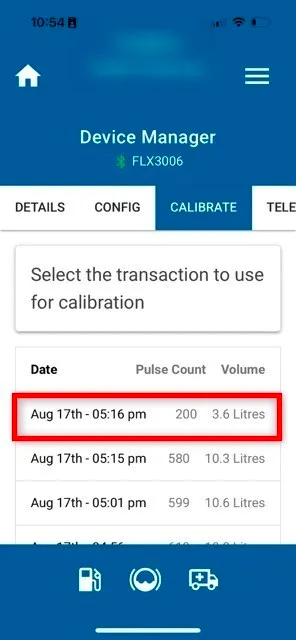
Select a previous transaction with a known correct volume, usually a recent dispensing event into a calibration jug. Make sure the dispensed volume visually matches the Dispense Summary for accuracy. Once verified, tap on the transaction to proceed with calibration.
-
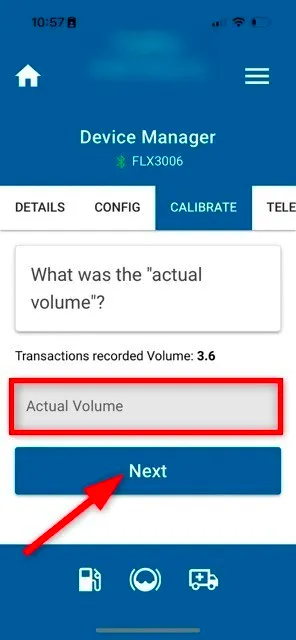
Enter the Actual Volume, then click the Next button to proceed.
-
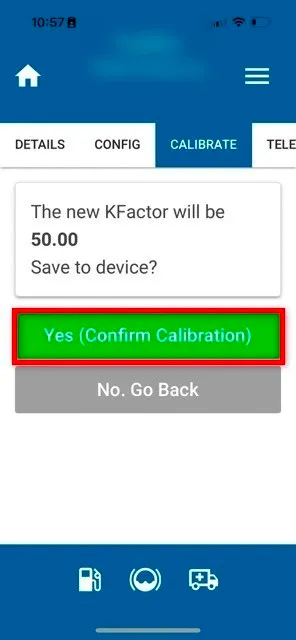
Click Yes (Confirm Calibration) button to save the revised kFactor to the device.
-
The revised KFactor will be automatically calculated and saved.
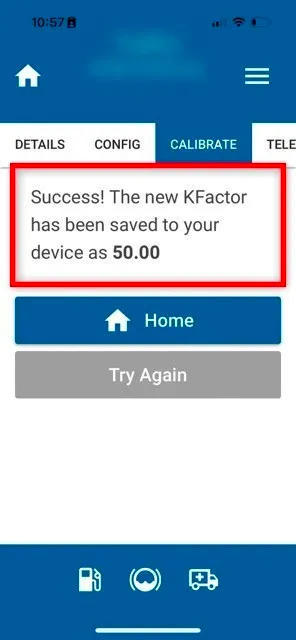
-
Click the Home button to return to the main menu.
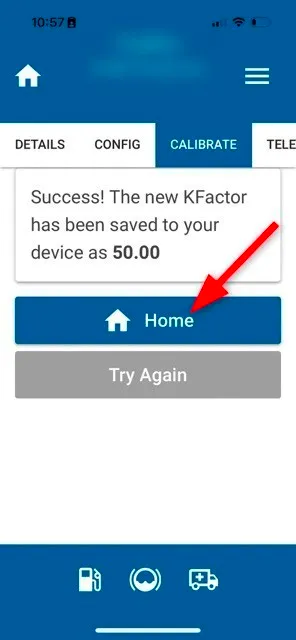
Dispense another test run into the jug and confirm the calibration is accurate.
Correcting Historical Transactions
Once the calibration factor has been confirmed, it can also be used to determine the correction required for applicable historical Fuellox transactions. Confirm with the Fuellox team which transactions should be adjusted before applying the correction retrospectively.
Calibrating High Flow and Large Capacity Meters
In some instances, the Fuellox unit may be connected to a bulk meter. In such cases, a larger transaction should be used for calibration. If the bulk meter is already calibrated, it can be used as a reference to complete the calibration process.
Advanced Calibrations
Multiple transactions can be utilized to perform a linear calibration by following these steps:
-
Record Data: Use a charting tool like Excel to enter Pulses and Actual Volumes.
-
Visualize Data: Create a point cloud or XY scatter chart to plot the data.
-
Add a Trendline:
a. Set the intercept to 0 (i.e., 0 pulses = 0 liters).
b. Enable the equation display.
c. Turn on R-squared (r²) value for accuracy assessment.
-
Determine the KFactor: The gradient (slope) of the trendline represents the kFactor.
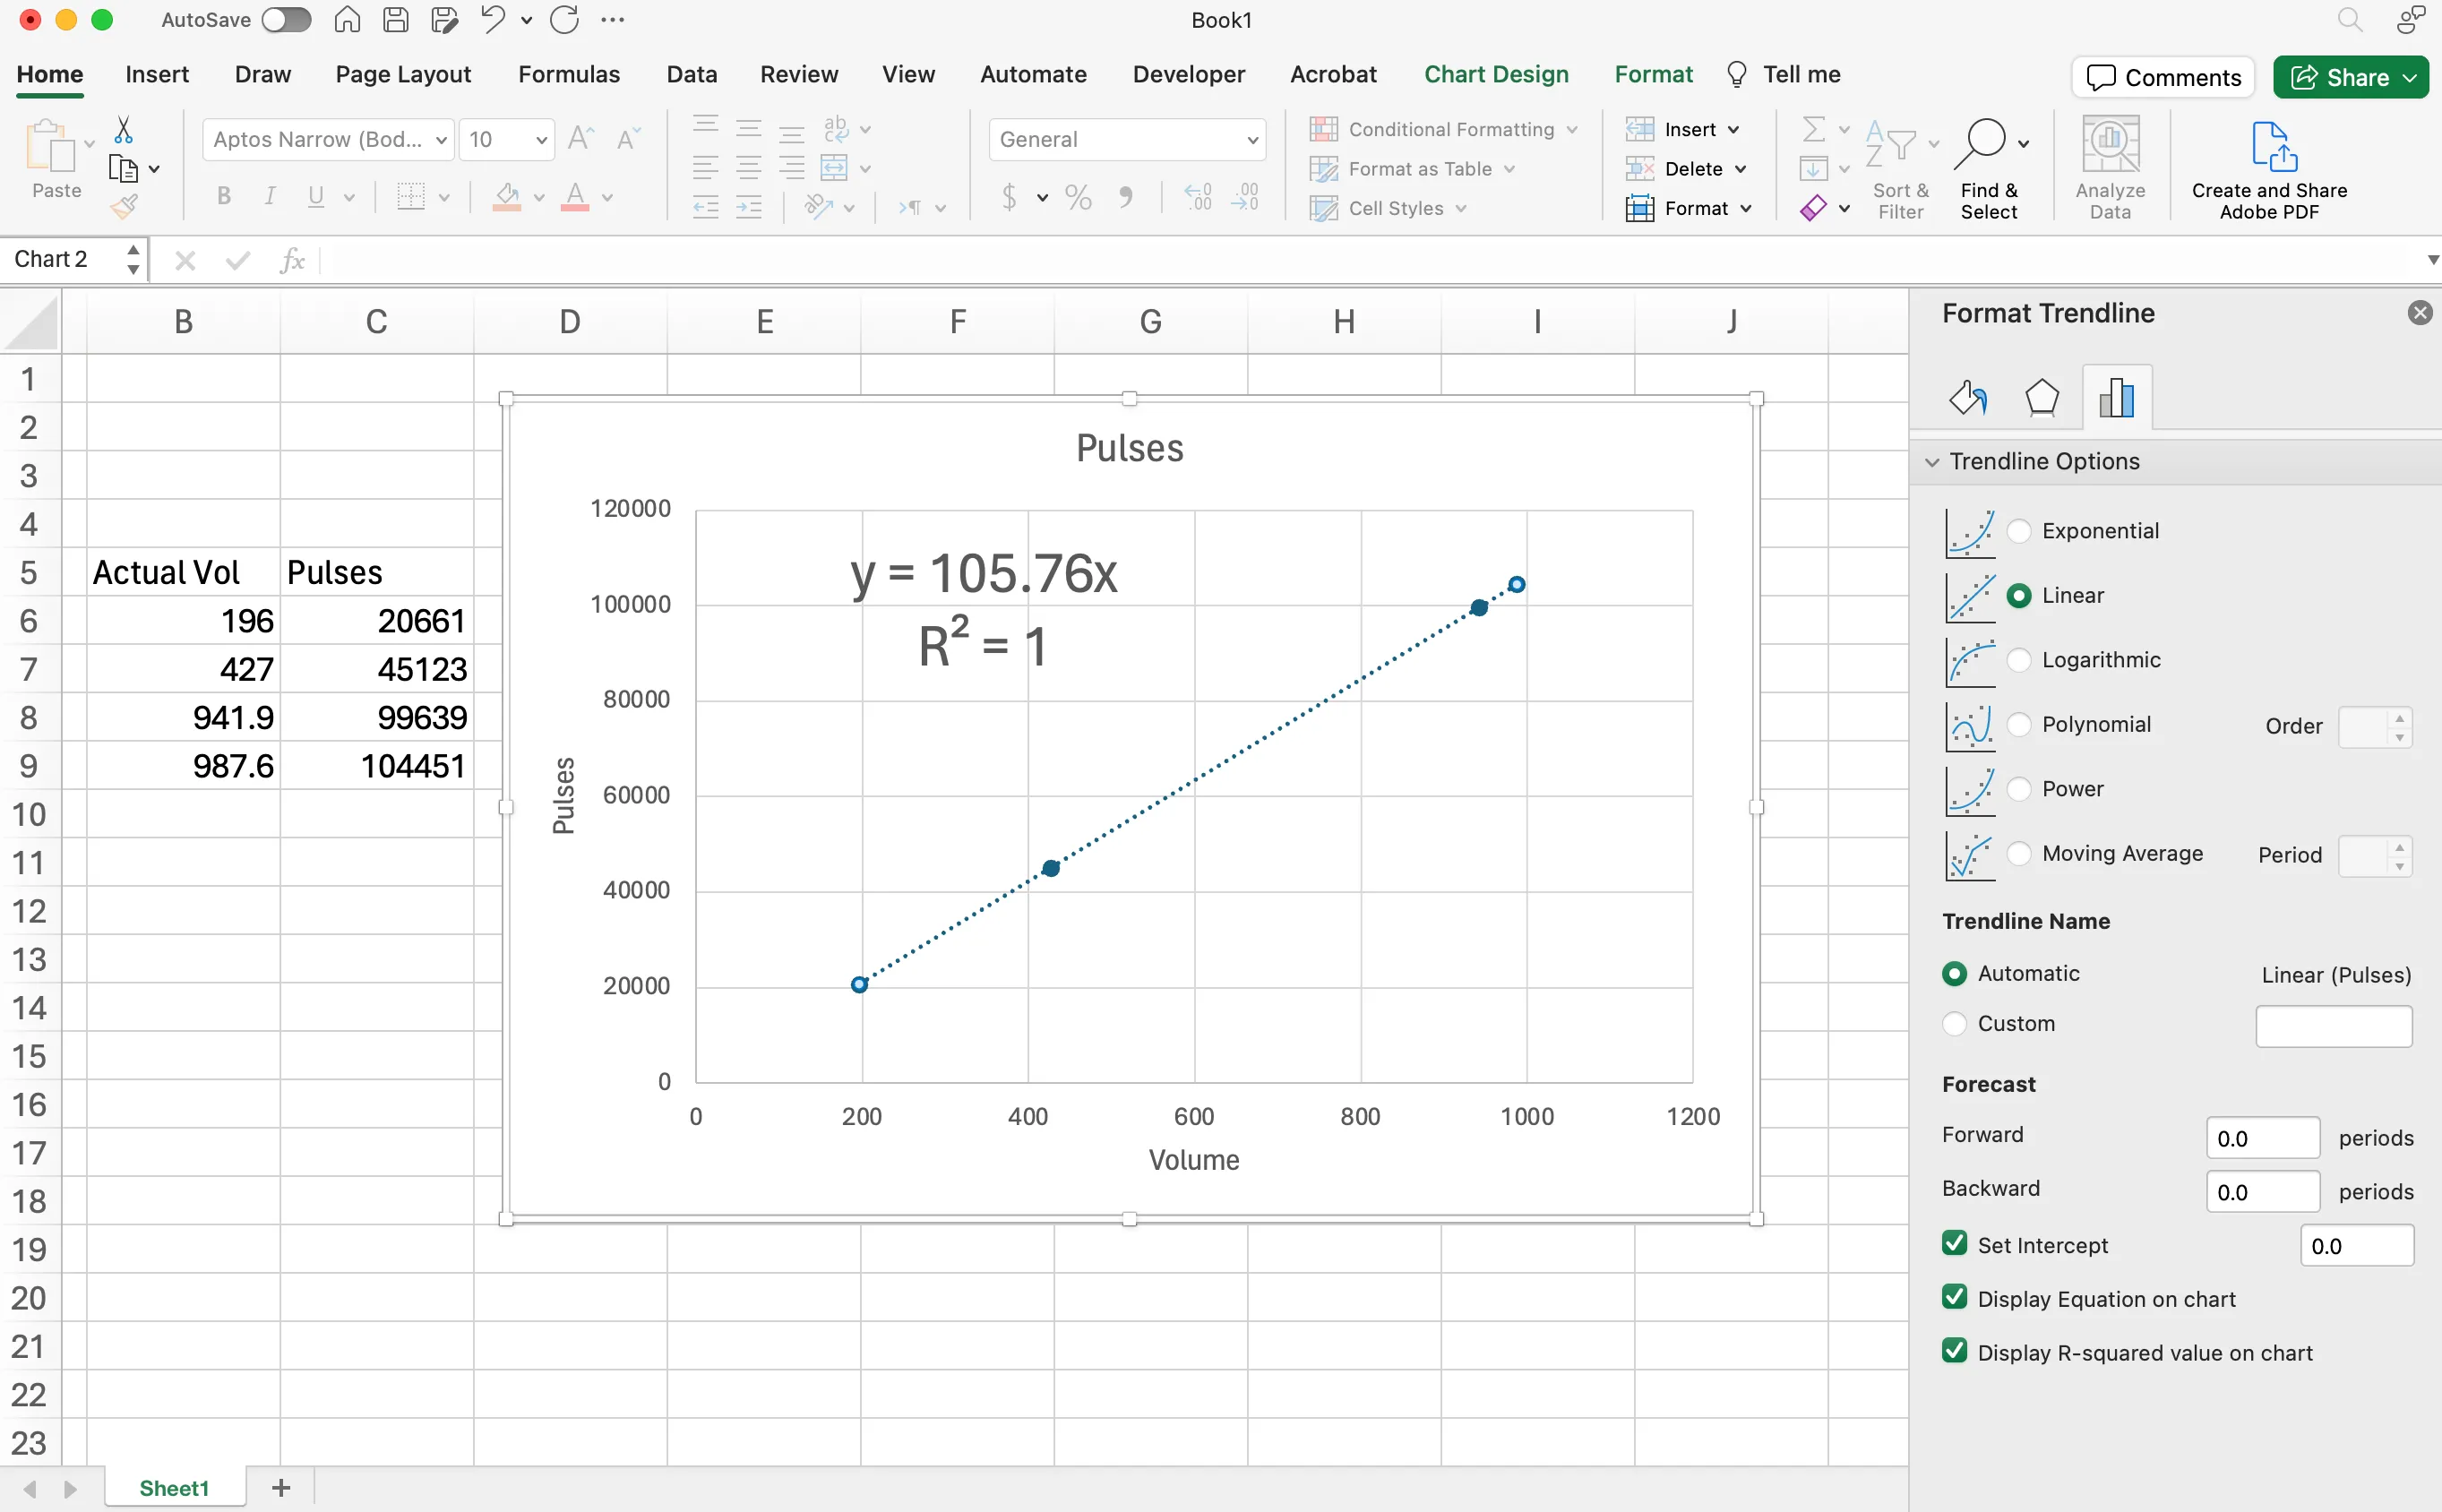
This process helps eliminate variations across transactions and ensures a more accurate calibration. Additionally, it allows for the identification and exclusion of outlier data that may not be relevant or useful for calibration purposes.
You can Download the Excel template for this chart and use it to input your data. Simply open the template and replace the sample data with your own values for accurate calibration analysis.
Recording Calibration Data
-
Pump fuel into a jug or use an existing calibrated meter.
-
Record the Fuellox transaction volume, pulse count, and actual volume.
-
Retain the app_transaction_id for future reference if you need to revisit the sample data.
-
Overwrite the sample data in the worksheet with the actual volume and pulse count.
-
If using a jug, you can apply a cumulative approach by adding multiple transactions.
-
For example, combining two 20L transactions to create a 40L sample point, while also adding the corresponding pulse counts.
Following are the Analysis & Insights:
Line Gradient: Represents the KFactor used for calibration.
R-Squared Value: Indicates the accuracy and reliability of the linear fit.
Calibration Equation
The kFactor is the gradient of this line. In the case the actual kFActor is 105.76
This line is in the form of Y = MX + B where:
- Y represents the volume.
- M represents the KFactor.
- X represents the number of pulses.
- B represents the offset. 0 in our case.
Calibration R-Squared
Statistics: R-Squared indicates how well the data fits the regression model.
The R-Squared value represents the quality of fit in the calibration process. In this case, it demonstrates a perfect fit (100%), ensuring optimal accuracy.
Creating a Calibrated Reference Vessel
If you don’t already have a vessel with an exact, known-volume marking, you can create one using an approved fuel jerry can and a service-station dispenser.
What You Will Need
- An approved fuel jerry can with a capacity greater than 15 litres
- A permanent marker or clearly visible tape
- Access to a service-station fuel dispenser
-
Take the empty jerry can to a service station.
-
Using the service-station dispenser, put exactly 15.00 litres into the jerry can.
-
Allow the fuel level to settle on a level surface.
-
Mark the fuel level clearly on the outside of the jerry can using a permanent marker or tape.
-
Label the mark “15 L”.
-
Decant the fuel safely into an appropriate vehicle or storage tank, leaving the jerry can empty.
The jerry can now provides a known 15-litre reference volume. Once you have your marked reference vessel, follow the Calibration steps above, using this vessel as your known-volume reference.
Return to Getting Started